DIY or Pro? The Comprehensive Guide to RV Roof Repair Kits and Services
Why Your RV Roof Deserves Your Attention
RV roof repair prevents leaks and costly water damage (often over $5,000). Here’s what you need to know:
Quick Repair Solutions:
- Small cracks/holes (< 1/4"): Clean area, apply EternaBond tape or self-leveling sealant
- Rubber roof tears: Use EternaBond tape 2″ larger than damage, seal edges with lap sealant
- Fiberglass damage: Sand, fill with marine epoxy, apply UV-resistant coating
- Metal roof leaks: Remove rust, apply rust reformer, seal seams with metal roof coating
- Emergency fixes: Cover with tarp, apply repair tape, seal temporarily until permanent repair
When to call a professional:
- Damage exceeding 3 feet in any direction
- Soft spots indicating structural rot
- Delamination affecting more than 30% of roof surface
- Leaks near electrical components
A small drip can signal a major problem. An overlooked crack can lead to water damage, rot, mold, and repairs costing thousands. Fortunately, most issues are preventable with regular maintenance, and many repairs are DIY-friendly.
Professional repairs cost $300–$1,500, while replacements can exceed $8,000. For the nearly 40 million Americans RVing annually, roof maintenance is essential for protecting your investment.
This guide covers identifying roof types, gathering tools, performing safe repairs, and deciding between DIY and professional help. Learn to spot and fix problems early to prevent major disasters.
I’m Byron Tarlton, founder of Road Rescue Network. With over two decades of experience helping travelers, I’ve seen how preventive care saves thousands in emergency repairs. We connect RV owners with mobile pros who understand RV roof repair.
, choose DIY repair with proper materials for small issues or professional service for extensive damage, followed by regular maintenance schedule of inspections every 90 days, cleaning 2-3 times yearly, and resealing seams annually - RV roof repair infographic")
RV roof repair terms to remember:
First, Identify the Enemy: How to Inspect Your RV Roof and Find Leaks
Successful RV roof repair starts with a thorough inspection. Water damage is the silent killer of RVs, with a single crack leading to over $5,000 in damage. Early leak detection is crucial to protect your investment and your adventures.
Common RV Roof Types and Their Vulnerabilities
RV roofs come in a few common types, each with its own strengths and weaknesses. Understanding these helps us identify potential vulnerabilities and choose the right repair strategy.
- EPDM and TPO Roofs (Rubber): The most common roof type, these are flexible and lightweight. A well-maintained rubber roof can last 20 years (or 30+ for newer PVC). They are vulnerable to UV damage, which causes cracking, and can be torn or punctured. Leaks often start at separated seams.
- Fiberglass Roofs: Rigid, durable, and mildew-resistant. Vulnerabilities include gelcoat cracks from UV exposure and thermal expansion, osmotic blisters from trapped moisture, and oxidation that can compromise the protective layer.
- Metal Roofs (Aluminum/Steel): Common on older RVs, these are tough and durable. Watch for corrosion around seams and fasteners, cracks from thermal changes, and punctures or dents from impacts.
All roof types are susceptible to UV damage, extreme temperatures, hail, and impacts, which can cause cracks and punctures.
The Telltale Signs of Roof Damage
Spotting roof damage early is crucial for effective RV roof repair. Here’s what to look for, both inside and out:

- Interior Signs:
- Water stains: Discoloration on ceilings, walls, or floors, especially near vents and windows.
- Soft spots: Spongy areas on ceilings or walls indicate water damage and potential rot.
- Bubbling or peeling wallpaper: A sign of moisture behind interior finishes.
- Musty smells or mold: A damp odor or visible mold clearly indicates a leak.
- Exterior Signs:
- Cracked sealant: The most common sign. Check sealant around all vents, skylights, AC units, and roof edges, where most leaks start.
- Discoloration or chalkiness: Indicates UV degradation, especially on rubber roofs.
- Visible cracks, tears, or punctures: Any physical damage to the roof material.
- Soft spots on the roof: Soft areas underfoot (if walkable) suggest a damaged sub-structure.
A Step-by-Step Guide to Pinpointing a Leak
Finding the exact source of a leak can feel like detective work, but it’s a vital step for effective RV roof repair.
- Interior Inspection: Note the location of any interior water stains, soft spots, or musty odors to narrow your search.
- Exterior Visual Inspection: On the roof, inspect the area above the interior damage. Check all seams, sealants, and penetrations for hairline cracks or pinholes.
- Hose Test: If a visual inspection fails, have a spotter inside while you slowly spray small sections of the roof with a hose, working from low to high. The spotter calls out when a drip appears, pinpointing the leak.
- Advanced Tools: For elusive leaks, a FLIR (Forward-Looking Infrared) camera can detect moisture under the roof surface. A UV flashlight can reveal tiny cracks in sealant that are invisible to the naked eye.
- Chalk Test: Running water over a dusty roof can leave a trail (a ‘chalk line’) that leads directly to the leak’s source.
Prompt action is key to minimizing the cost and extent of the RV roof repair.
The RV Roof Repair Toolkit: Essential Tools and Materials
Having the right tools and materials is half the battle for any RV roof repair. You’ll need both universal essentials and material-specific products.
Universal Repair Essentials
These are the fundamental items you’ll want in your arsenal for almost any RV roof repair:
- Putty Knife/Scraper: To remove old sealant and debris.
- Caulk Gun: For applying new sealants.
- Soft-Bristle Brushes & Clean Cloths: For cleaning.
- Denatured Alcohol or Acetone: For prepping surfaces to ensure proper adhesion.
- Rollers: To press down tapes and patches, removing air bubbles.
- Gloves & Safety Glasses: Essential personal protection.
- Sturdy Ladder: For safe roof access.
- Non-Slip Shoes: For safe traction on the roof.
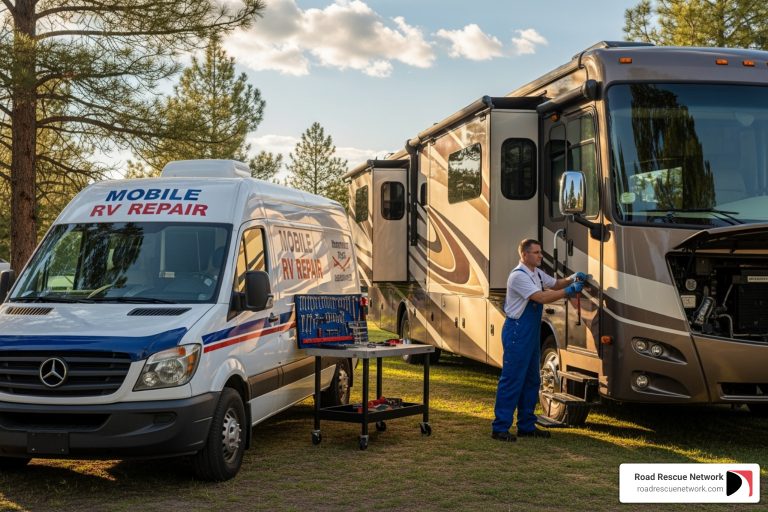
If a job is too big for DIY or you need help on the road, professionals are available. For example, you can Find mobile RV repair in California.
Material-Specific Solutions: Sealants, Tapes, and Coatings
Choosing the right products for your roof type is critical for a lasting RV roof repair. Avoid general-purpose silicone caulk.

- For Rubber (EPDM/TPO) Roofs:
- EternaBond RoofSeal Sealant Tape: A top-tier, permanent repair tape for rips and holes with an incredibly strong hold.
- Dicor self-leveling lap sealant: The standard for sealing around vents and seams. It flows to create a seamless, watertight barrier.
- Liquid Rubber Roof Coating: Systems like Dicor EPDM Rubber Roof Coating reseal an entire aging roof, adding years to its life.
- For Fiberglass Roofs:
- Marine-Grade Epoxy: Fills cracks and gouges with a strong, waterproof bond (e.g., MarineTex).
- Fiberglass Repair Kits: Include cloth and resin to rebuild larger damaged sections.
- UV-Resistant Gelcoat or Coating: After repairs, apply a new gelcoat or a product like Dicor Fiberglass Roof Coating to protect the roof and restore its look.
- For Metal Roofs:
- Rust Converters/Inhibitors: Treat corrosion with products like Rust-Oleum Rust Reformer.
- Metal Roof Patches: Adhere with strong adhesive and seal for larger holes.
- Dicor Metal RV Roof Coating: A durable, elastomeric coating specifically for resealing and protecting metal RV roofs.
Always use products compatible with your roof material. When in doubt, consult your RV manufacturer.
Your Guide to DIY RV Roof Repair and Professional Services
Deciding between DIY RV roof repair and calling a pro is a common dilemma. Minor repairs are often DIY-friendly, but some issues require an expert.
Safety First: Precautions for Working on Your RV Roof
Before you even think about climbing onto your RV, safety is paramount. An RV roof can be a dangerous place, especially if it’s wet or damaged.
- Assess Roof Walkability: Check your owner’s manual before walking on the roof. If it’s not walkable or you suspect damage, use plywood to distribute your weight.
- Ladder Safety: Use a stable, secured ladder on level ground. Don’t lean it against RV sidewalls or gutters to avoid damage.
- Personal Protective Equipment (PPE): Wear non-slip shoes, safety glasses, and gloves. Consider a safety harness for sloped roofs or heights over six feet. Use respirators with chemicals.
- Weather Conditions: Don’t work in rain, high winds, or extreme heat. Most sealants need temperatures above 50°F (10°C) to cure. Avoid dew.
- Ventilation: Ensure good ventilation when using chemicals and keep flammable materials away from ignition sources. Do not smoke.
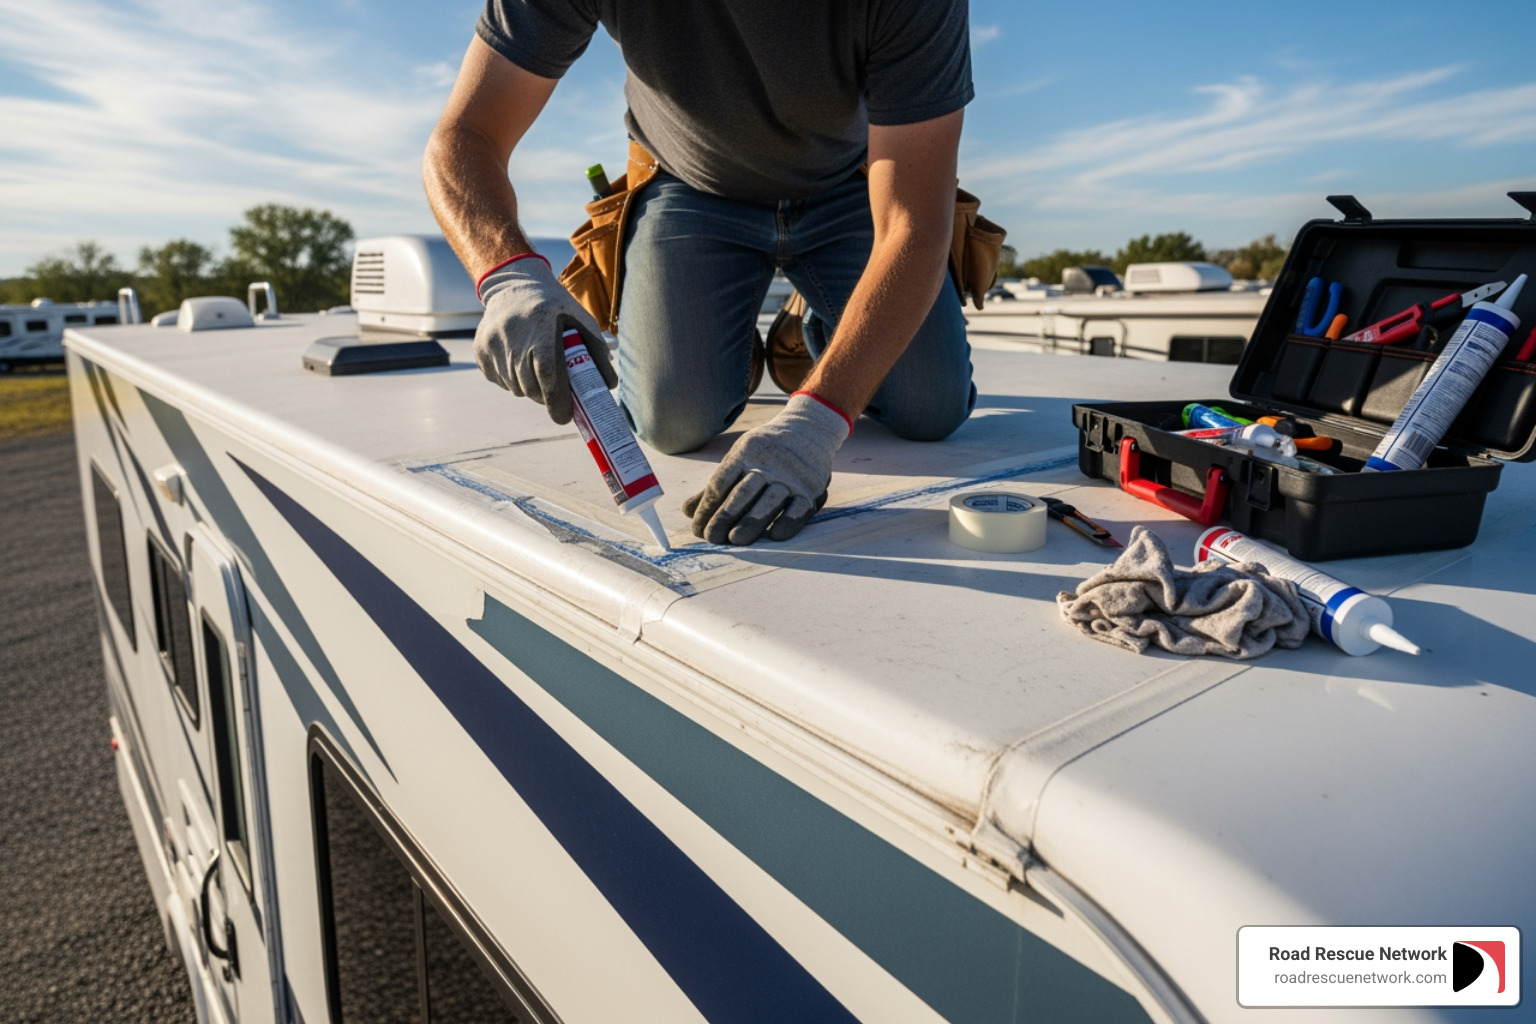
Step-by-Step Rubber (EPDM/TPO) RV Roof Repair
- Surface Preparation: This is the most critical step. Clean the area with a specialized rubber roof cleaner or denatured alcohol, avoiding petroleum or citrus-based products. Scrape away old sealant. The surface must be clean and dry for proper adhesion.
- Patching Tears: Cut a patch of EPDM material or EternaBond Tape at least 2 inches larger than the damage. Apply adhesive, press the patch firmly with a roller to remove air bubbles, and seal the edges with Dicor self-leveling lap sealant.
- Resealing Seams: If you find cracked or lifting sealant around vents or edges, remove the old sealant, clean the area, and apply a fresh bead of Dicor self-leveling lap sealant.
- Full Recoating: For an aging, chalky, or cracked roof, use a full coating system like the Dicor EPDM Rubber Roof Coating System. This involves priming and coating the entire roof to add a new, long-lasting protective layer.
How to Fix Fiberglass and Metal RV Roofs
Fiberglass and metal roofs require different approaches due to their rigid nature.
- Fiberglass Roof Repair:
- Cleaning and Prep: Clean the area with a mild detergent or Bar Keepers Friend. Use specialized products like Davis FSR for stains or Meguiar’s Oxidation Remover for oxidation.
- Small Cracks/Blisters: Sand the area, fill with marine-grade epoxy (like MarineTex), let it cure, and sand smooth.
- Larger Damage: Use a fiberglass repair kit for bigger holes. Apply layers of resin-saturated cloth over the damage, build it up until flush, and sand smooth.
- Coating and Sealing: Protect the repair by applying a UV-resistant gelcoat or a product like Dicor Fiberglass Roof Coating. Reseal all seams with Dicor self-leveling lap sealant.
- Metal RV Roof Repair:
- Rust Removal: Use a wire brush to remove loose rust, then apply a rust converter like Rust-Oleum Rust Reformer.
- Sealing Small Holes/Cracks: After cleaning, apply EternaBond Tape or a quality metal roof sealant.
- Full Resealing: For a complete overhaul, use an elastomeric product like Dicor Metal RV Roof Coating to seal and protect the entire surface.
On-the-Road Emergencies: Temporary RV Roof Repair Fixes
Sometimes, a leak springs up when you’re far from home or a repair shop. Having a few temporary fixes on hand can save your trip and prevent major damage.
- EternaBond RoofSeal Sealant Tape: Your best friend for emergencies. This ultra-strong tape provides a near-permanent seal. Clean the area, apply the tape carefully, and press firmly.
- Tarps: A tightly secured tarp offers immediate but temporary protection. Ensure it doesn’t obstruct vents for appliances like your HVAC, which could cause CO2 buildup.
- Emergency Sealant: Keep RV-specific sealant or a patch kit for quick fixes. Apply generously over a clean surface to get you to a repair shop.
- Dry Out the Interior: After a temporary fix, use fans to dry the interior completely to prevent mold.
If you’re on the road and need help, mobile RV repair services are available. For instance, travelers in the Sunshine State can Find mobile RV repair in Florida.
The Big Decision: Repairing vs. Replacing Your RV Roof
Every RV owner eventually faces the repair vs. replace decision. It’s a choice that impacts the long-term health and value of your RV.
Cost Breakdown: DIY vs. Professional Services
The financial aspect is often a major factor in this decision.
| Criteria | Repair (DIY) | Repair (Professional) | Replacement (Professional) |
|---|---|---|---|
| Cost | $50 – $500 (materials only for minor fixes) | $300 – $1,500 (typical basic repairs) | $5,000 – $8,000 (or more, for full replacement) |
| Damage Level | Small cracks, punctures, peeling sealant | Localized leaks, moderate tears, sealant failure | Extensive delamination, soft spots, structural rot, large holes |
| Time | A few hours to a weekend | A few hours to a day or two | Several days to a week or more |
| Skill | Moderate (attention to detail, safety) | Expert (specialized tools, experience) | Expert (structural, complex materials) |
- DIY Repair Costs: You can save on labor. Minor repairs cost $50-$200 for materials like EternaBond tape and Dicor sealant. A full DIY recoating project might cost $300-$500.
- Professional Repair Costs: Basic professional repairs range from $300–$1,500, including labor and materials, depending on the damage.
- Full Replacement Costs: A full replacement is a major expense, typically $5,000 to $8,000 or more. Labor is a significant factor, especially if underlying rot requires structural work before the new roof can be installed.
When to Repair vs. When to Replace
The decision hinges on the extent of the damage and the overall condition of your RV.
- Repair Your RV Roof If:
- Damage is small and localized (e.g., under 6 inches).
- There are no signs of underlying structural rot.
- Leaks are isolated to a single vent or seam.
- The overall roof material is still in good condition.
- You have minor cracks, punctures, or sealant failure.
- Repair is cost-effective and offers a durable fix.
- Replace Your RV Roof If:
- Over 30% of the roof is delaminated or has widespread cracking.
- There are multiple soft spots, indicating extensive rot.
- You’re frequently re-patching the same areas.
- Damage is extensive (over 3 feet), making a patch impractical.
- You want to upgrade to a more durable material like PVC.
- The cost of repeated repairs makes replacement a better long-term investment.
If you’re unsure, get a professional assessment. An expert can determine the extent of the damage. For example, if you’re in Arizona, you can Find mobile RV repair in Arizona for an expert opinion.
Proactive Protection: Long-Term Maintenance and Prevention
The best RV roof repair is the one you avoid. Proactive maintenance is your shield against leaks and rot, preserving your RV’s value and your peace of mind.
The Ultimate RV Roof Maintenance Checklist
Consistency is key when it comes to RV roof maintenance.
- Inspect Frequently: Inspect your roof every 90 days (or every 30-60 days if stored uncovered). Also, check before and after long trips and after severe weather.
- Check Sealants: Annually inspect and reseal seams around all vents, skylights, and roof edges. Look for cracks or gaps. Consider a full roof recoating after ten years.
- Clear Debris: Regularly remove leaves and twigs. Debris traps moisture and can block water runoff.
- Clean Regularly: Clean your roof 1-3 times per year to improve longevity.
- UV Protection: Apply a UV protectant to rubber roofs to prevent sun damage.
- Proper Storage: Park under a shelter or use an RV cover to protect the roof from the elements.
- Keep Records: Document all repairs and keep receipts for warranty or insurance purposes.
Best Practices for Cleaning Your RV Roof
Cleaning your RV roof properly prevents premature wear and maintains its protective qualities.
- Use Approved Cleaners: Use specialized cleaners for rubber roofs (avoid petroleum or citrus ingredients). A mild detergent is fine for fiberglass.
- Avoid Harsh Tools: Do not use abrasive cleaners, stiff brushes, or pressure washers, which can cause damage. A soft-bristle brush is best.
- Clean Methodically: Rinse the roof, apply cleaner in sections, scrub gently, and rinse thoroughly.
- Remove Black Streaks: Black streaks often start on the roof. Clean the roof with products like Bar Keepers Friend and use a dedicated black streak remover for the sides.
How Weather Impacts Your Roof
Our RV roofs are constantly battling the elements, and understanding these impacts helps us prepare.
- Sun (UV) Degradation: UV rays are a primary cause of roof damage, causing materials to crack, fade, and fail. Use UV protectants and park in the shade.
- Rain: Rain exploits existing weaknesses. Standing water can find its way into tiny cracks, so ensure your roof is clean and drains properly.
- Hail: Hail can cause significant damage, from dents to cracks on all surfaces. In the U.S., hailstorms have been among the costliest storm events for insurers. Rubber roofs can crack, and metal roofs can dent.
- Prevention: Protect your RV by parking it under a shelter or using a hail cover. Monitor weather forecasts.
- Insurance: Comprehensive insurance usually covers hail damage, minus your deductible.
- Snow and Ice: Heavy snow can put immense stress on an RV roof, potentially leading to collapse. Ice dams, which form at roof edges, can prevent melting snow from draining, forcing water back up and under seals or into the RV. Clearing snow off your roof after winter storms is a good preventative measure.
Frequently Asked Questions about RV Roof Repair
How often should I inspect my RV roof?
Inspect your roof at least every 90 days—or every 30-60 days if stored uncovered. Also, check it before and after long trips and after any severe weather. Look closely for cracked or peeling sealant around all seams and fixtures. Early detection is key to preventing costly RV roof repair.
Will a DIY repair void my RV warranty?
It might. Always check your manufacturer’s warranty first. Some require certified technicians for all repairs, while others allow DIY work using approved methods and materials. If you do it yourself, document the process with photos and keep all receipts, as this can be crucial for future warranty claims.
Can I use Flex Seal on my RV roof?
We don’t recommend it for permanent RV roof repair. While it might work as a temporary patch, products like Flex Seal are not formulated for the specific materials (like EPDM or TPO) and stresses (UV exposure, vibration) of an RV roof. Using the wrong product can cause poor adhesion or make future repairs more difficult. Always use RV-specific products like Dicor sealants or EternaBond tape for durable, long-lasting results.
Conclusion
Navigating RV roof repair is manageable with the right knowledge and a proactive approach. This guide has covered everything from identifying roof types and spotting damage to performing safe DIY repairs.
Deciding whether to repair or replace involves balancing cost, damage, and long-term value. Regular inspection and maintenance are your best defense against expensive water damage.
Knowing your limits is key. For complex issues or extensive damage, don’t hesitate to call a professional. Road Rescue Network connects you with reliable mobile RV repair experts for any job, big or small.
Protect your investment and your adventures by keeping your roof in top shape. If you need help, Find mobile RV repair services in your area through Road Rescue Network.