Jump Start Your Car Like a Pro
Why Every Driver Needs to Know How to Perform a Vehicle Jump Start

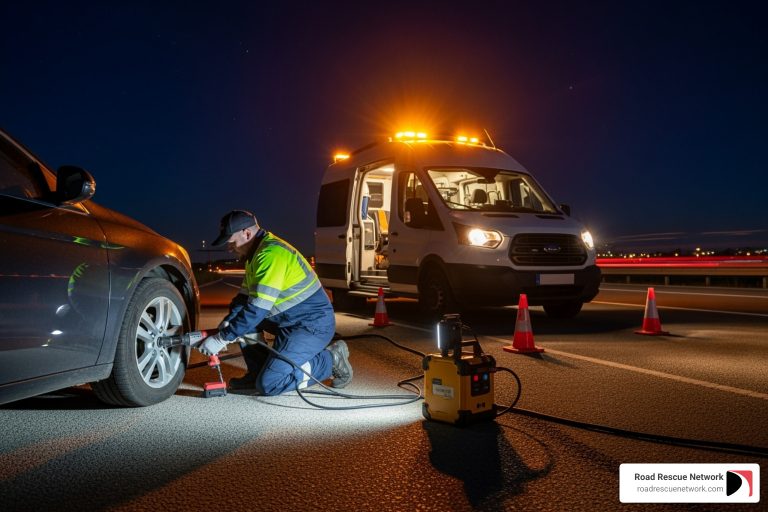
A vehicle jump start is one of the most common roadside emergencies you’ll face as a driver. Whether you left your headlights on overnight, your battery succumbed to freezing temperatures, or it’s simply reached the end of its 5-7 year lifespan, knowing how to safely jump-start your car can save you time, money, and the frustration of waiting for help.
Quick Answer: How to Jump Start a Car
- Position vehicles – Park the working car close to the dead one (without touching)
- Connect red cable – Attach to positive (+) terminal on dead battery, then to positive (+) on good battery
- Connect black cable – Attach to negative (-) terminal on good battery, then to unpainted metal on dead car’s engine
- Start working car – Let it run for 5-10 minutes
- Start dead car – Try starting your engine
- Disconnect in reverse order – Remove cables carefully, starting with the black cable from your car’s ground
Jump-starting a car is a simple process that can save you from having to call a tow truck or mechanic. However, modern vehicles have sensitive electrical systems that can be damaged if you don’t follow the correct procedures. Dead batteries are incredibly common – at 5°F, a fully charged battery has only half of its rated capacity, making cold weather a prime culprit for morning no-starts.
The good news? With the right tools and knowledge, you can safely perform a vehicle jump start in about 15 minutes. This guide will walk you through every step, from gathering the essential equipment to troubleshooting when things don’t go as planned.
About Your Guide: I’m Byron Tarlton, founder of Road Rescue Network, with over two decades of experience in the roadside assistance and transportation industry. I’ve helped thousands of stranded drivers through Interstate Fleet Services and Road Rescue Network, and I’ve personally performed countless vehicle jump starts in every condition imaginable – from freezing winter mornings to scorching summer parking lots.

Terms related to vehicle jump start:
Before You Begin: Essential Tools & Safety First
Before we even think about touching a battery, we need to make sure we’re prepared. This section covers the crucial preparation steps before you connect any cables, ensuring you have the right equipment and knowledge to perform a vehicle jump start safely and effectively.
Gathering Your Jump-Starting Kit
Having the right tools on hand is half the battle. Here’s what you’ll need:
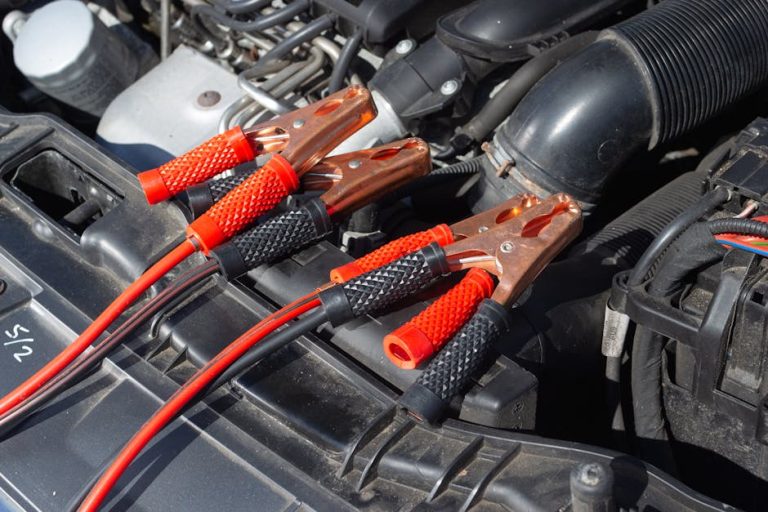
- Jumper Cables: These are non-negotiable. For most vehicles, we recommend 4-gauge or 6-gauge wires, as thinner 10-gauge cables might not provide enough power. Longer jumper cables, ideally 16-20 feet in length, offer more flexibility, especially when parking vehicles in tricky spots. Look for cables with heavy-duty clamps and clear polarity markings (red for positive, black for negative).
- Portable Jump Starter: If you anticipate needing to jump-start your car frequently or prefer not to rely on another vehicle, a portable jump starter is an excellent investment. These handy tools are small enough to keep in your trunk or even glovebox and often come with built-in lights and USB ports for charging other devices.
- Safety Gloves: Rubber work gloves protect your hands from battery acid, corrosion, and electrical shocks.
- Eye Protection: Safety goggles are crucial to shield your eyes from sparks or battery fluid, which can cause serious injury.
- Wire Brush or Aluminum Foil: Useful for cleaning corroded battery terminals, ensuring a better connection for your jumper cables.
- Fire Extinguisher: While rare, battery explosions can happen. Having a small fire extinguisher nearby is a smart precaution.
Critical Safety Precautions
Safety is paramount when dealing with car batteries and electrical systems. Ignoring these steps can lead to serious injury or costly damage to your vehicle’s sensitive electronics.

- Risk of Electrical Damage: Modern cars have complex electrical systems that are highly sensitive to voltage spikes and incorrect connections. Improper jump-starting can fry electronic components, leading to hundreds or even thousands of dollars in repairs.
- Battery Explosion Hazard: Car batteries produce flammable hydrogen gas, especially when charging. A spark near these gases can cause the battery to explode. This is why we never connect the final negative clamp directly to the dead battery’s negative terminal.
- Thermal Runaway: If you’re using a portable lithium-ion jump starter, be aware of the risk of thermal runaway. This phenomenon can cause lithium-ion battery cells to overheat uncontrollably, potentially leading to smoke and fire. Always follow the manufacturer’s instructions for your device.
- Turn Off Vehicles and Electronics: Before connecting any cables, ensure both vehicles are turned off. This includes the ignition, headlights, radio, climate control, and any other electrical accessories. This prevents electrical surges and protects both cars’ systems.
- No Smoking or Open Flames: Keep all flames, sparks, and lit cigarettes far away from the battery area to avoid igniting flammable battery gases.
- Check for Battery Leaks or Damage: Never attempt to jump-start a battery that is cracked, leaking, bulging, or frozen. A damaged battery could explode. If you notice any of these signs, it’s time for a replacement, not a jump.
- Remove Metal Objects: Take off any dangling jewelry, watches, or other metal objects that could accidentally touch battery terminals and cause a short circuit.
Positioning Vehicles and Identifying Battery Terminals
Proper positioning is crucial for safety and ease of connection.
- Vehicle Positioning: Park the assisting vehicle (with the good battery) close enough to the vehicle with the dead battery so that your jumper cables can easily reach both batteries. Ideally, face the cars towards each other or side-by-side, but ensure they are not touching. We recommend leaving enough space to safely move around between them.
- Engage Parking Brake: Always engage the parking brake on both vehicles. This prevents accidental movement. If the vehicle with the good battery is an automatic, put it in “Park.” If it’s a manual, put it in “Neutral.”
- Locating the Battery: Open the hoods of both vehicles. The battery is usually a rectangular box with two terminals on top. Some vehicles, particularly newer models, might have the battery located in the trunk or under the rear seat. Consult your owner’s manual if you can’t find it.
- Positive Terminal (+): This terminal is usually marked with a plus sign (+) and often has a red cap or a red cable connected to it.
- Negative Terminal (-): This terminal is usually marked with a minus sign (-) and often has a black cap or a black cable connected to it.
- Cleaning Corrosion: If the battery terminals are covered in corrosion (a white or bluish powdery substance), use a wire brush or even a piece of aluminum foil to gently clean them. Good contact is essential for power transfer. If you’re wearing eye protection, you can try wiggling the clamps back and forth on the posts to create a better connection on dirty terminals.
The Step-by-Step Guide to a Vehicle Jump Start
Now that we’re prepared, let’s get down to business. Follow these instructions precisely to transfer power from a working vehicle to yours without causing harm to either car’s sensitive electronics.
How to Correctly Connect Jumper Cables
This is the most critical part of the process. Pay close attention to the order!

- Connect Red Clamp to Dead Battery’s Positive (+): Take one red (positive) jumper cable clamp and attach it securely to the positive (+) terminal of the dead battery. Make sure it’s a firm connection.
- Connect Other Red Clamp to Good Battery’s Positive (+): Take the other red (positive) jumper cable clamp and attach it securely to the positive (+) terminal of the good battery in the assisting vehicle. Again, ensure a firm connection.
- Connect Black Clamp to Good Battery’s Negative (-): Take one black (negative) jumper cable clamp and attach it securely to the negative (-) terminal of the good battery.
-
Connect Other Black Clamp to Unpainted Metal Ground on Dead Car: This is a crucial safety step. We do not connect the final black clamp directly to the negative terminal of the dead battery. Instead, find a substantial, unpainted metal part of the engine block or chassis on the car with the dead battery. This could be a metal bracket, bolt, or engine hoist hook, away from the battery and fuel system. This provides a safe ground connection and helps prevent sparks near potentially explosive battery gases.
Why this specific order and grounding? Connecting the final negative clamp to an unpainted metal surface of the car, rather than directly to the negative battery terminal, is a safety precaution to prevent sparks near the battery. Batteries can emit hydrogen gas, which is highly flammable. By grounding away from the battery, we minimize the risk of explosion.
For a visual guide, you can refer to this step-by-step guide.
Starting the Engines and Disconnecting Safely
Once the cables are connected, it’s time to bring your car back to life.
- Start the Good Car: Start the engine of the assisting vehicle (the one with the good battery). Let it run for about 5 to 10 minutes. Some sources suggest 15-20 minutes, or even revving the engine slightly to 2000-3000 RPM, to ensure enough charge is transferred to the dead battery. This allows the good battery to charge the dead one a bit before you attempt to start.
- Try to Start the Dead Car: After the good car has run for a few minutes, try to start the engine of the car with the dead battery. If it starts, great! Let both vehicles run for another 5-10 minutes to allow the alternator in your car to begin recharging your battery.
-
Disconnect in Reverse Order: This is just as important as the connection order.
- First, remove the black (negative) clamp from the unpainted metal ground point on the previously dead car.
- Next, remove the black (negative) clamp from the negative (-) terminal of the assisting vehicle’s battery.
- Then, remove the red (positive) clamp from the positive (+) terminal of the assisting vehicle’s battery.
- Finally, remove the red (positive) clamp from the positive (+) terminal of your car’s battery.
Make sure the clamps don’t touch each other or any metal surfaces on either car during disconnection. Once disconnected, allow your car’s engine to idle for at least one minute before driving off.
Jump Starter Packs vs. Jumper Cables
A dead battery doesn’t always require a friendly stranger. Understanding the difference between traditional jumper cables and modern portable jump starters can help you decide which method is best for you.
Using a Traditional Vehicle Jump Start with Cables
This is the classic method, and it’s effective when done correctly.
- Pros: Jumper cables are relatively inexpensive and are a common item to find in any roadside assistance kit. They’ve been a reliable solution for decades.
- Cons: The biggest drawback is the absolute necessity of another vehicle with a working battery. This means you’re dependent on someone else’s availability, and you need to ensure their battery has similar voltage to yours. Cable length can also be a limiting factor if vehicles can’t get close enough.
For more detailed information on this method, check out how to use jumper cables.
The Convenience of a Portable Jump Starter
Portable jump starters are a modern marvel, offering independence and versatility.
- Pros: The most obvious advantage is that you don’t need another car! These devices are incredibly portable, often small enough to fit in your trunk or glovebox. Many come with useful extras like USB ports for charging phones and tablets, and some even have built-in lights, which are incredibly handy if you’re stranded in the dark. Road Rescue Network often sees drivers using these for convenience. As experts at Batteries Plus told us, jump starters will usually provide an estimated number of starts a fully charged device can attempt before needing a recharge. A half-charged jump starter still delivers the same power per attempt, it just won’t last as long.
- Cons: They tend to be more expensive than basic jumper cables. Also, they require periodic recharging themselves to be ready when you need them. Portable power stations, while multi-purpose, are often too large for emergency vehicle use; dedicated jump starters are designed for portability.
When choosing a portable jump starter, we consider several power metrics:
- Peak Amperage: This is the initial, very short burst of power (20-50 milliseconds for lead-acid batteries).
- Cranking Amps (CA) and Cold Cranking Amps (CCA): These measure continuous power over 30 seconds. CA is taken at 32°F, while CCA (more crucial in colder climates like those in Chicago, IL, or Boston, MA) is measured at 0°F. The average passenger vehicle’s CA/CCA rating is usually around 400-500. We recommend matching or exceeding your vehicle’s battery ratings.
- Energy (Wh): Watt-hours indicate the total stored energy and how many jump starts the device can perform before needing a recharge.
To use a portable jump starter:
- Ensure the pack is sufficiently charged and stable on a flat surface.
- Connect the red (positive) clamp to your car’s positive (+) battery terminal.
- Connect the black (negative) clamp to an unpainted metal part of your car’s engine block or chassis (the same grounding point as with traditional cables).
- Switch on the jump starter.
- Attempt to start your car.
- Once the car starts, immediately switch off the jump starter and disconnect the cables in reverse order.
- Remember to recharge your portable jump starter after each use.
Troubleshooting and Post-Jump Procedures
So, your car is running, now what? Or maybe it didn’t start at all. This section helps you handle common issues, what to do after a successful jump, and how to identify a battery that’s on its last legs.
What to Do If the Jump Start Fails
It’s frustrating when your car doesn’t cooperate, even after a jump. If your vehicle jump start attempt doesn’t work, here’s how we troubleshoot:
- Check Connections: First, double-check all your jumper cable connections. Are they firm and on the correct terminals? Are the terminals clean? Sometimes, simply jiggling the clamps can improve contact.
- Clicking Noise: If you hear a rapid clicking noise when trying to start, but the engine doesn’t turn over, it often points to a potential starter issue, not necessarily the battery. A starter replacement can cost about $750 at a dealership service center.
- Electrical System Works, No Start: If your electrical system (radio, lights, dashboard) turns on after the jump, but the engine still doesn’t crank, you might have an issue with the ignition switch, a blown fuse, or the starter motor itself.
- Car Died Immediately After Jump: If your car started but then died right away, it likely didn’t get enough charge, or your alternator isn’t charging the battery. Try repeating the jump-start process, but let the assisting vehicle run for a longer period (15-20 minutes) before attempting to start your car, and then let both cars run for an extended period afterward.
- Battery Won’t Hold a Charge: If your battery is completely dead or very old, it might not accept a charge from a jump. This means it needs replacement. If your car needs multiple jumps, it’s a clear sign the battery is failing.
For more troubleshooting tips, Consumer Reports offers helpful advice.
Special Considerations for Hybrid and Electric Vehicles (EVs)
Hybrid and electric vehicles have unique electrical systems, but they still have a 12-volt auxiliary battery that can go flat.
- 12-Volt Auxiliary Battery: Yes, we can jump-start a hybrid or electric vehicle! These cars rely on a traditional 12-volt battery to power their accessories and start their main propulsion system (whether it’s the gasoline engine in a hybrid or the electric motor’s control systems in an EV). This 12-volt battery can die just like any other car battery.
- Locating the Battery: The 12-volt battery in hybrids and EVs is often located in less conventional spots, such as the trunk, under the back seat, or even under the hood but covered by plastic. Always consult your vehicle’s Owner’s Manual for the exact location and specific jump-starting procedures.
- Warning: Never Use an EV to Jump Another Car: While an EV can receive a jump, we strongly advise against using an EV to provide a jump to another vehicle. Their electrical systems are not designed for this, and you risk damaging the EV’s delicate electronics or its main high-voltage battery system.
- Using a Gas-Powered Car or Portable Jump Starter: When jump-starting a hybrid or EV, it’s best to use a traditional gas-powered car or a portable jump starter. The connection process for the 12-volt battery is generally the same as for a conventional car.
After the Jump: Recharging and Next Steps
Congratulations, your car is running! But the job isn’t quite done.
- Drive for 20-30 Minutes: After a successful vehicle jump start, we recommend driving your car for at least 20 to 30 minutes. This allows the alternator to sufficiently recharge the battery. Avoid stop-and-go traffic if possible; a continuous drive is better for recharging.
- Alternator Function: Your car’s alternator is responsible for charging the battery while the engine is running. If your battery keeps dying even after a jump and a good drive, it could indicate a failing alternator, not just a bad battery.
- Signs of a Failing Battery: A battery that needs frequent jump starts is trying to tell us something. Look out for these signs:
- Dimming Lights: Headlights or interior lights that appear dim, especially when starting the car.
- Slow Engine Crank: The engine turns over slowly or struggles to start.
- Battery Age: Car batteries typically last between 5 and 7 years. If your battery is older than this, it’s likely nearing the end of its life.
- Corrosion or Leaks: Excessive corrosion on the terminals or any signs of fluid leaking from the battery.
- When to Get a Battery Test: If you’ve had to jump-start your car, or if you’re noticing any of these warning signs, we recommend getting your battery tested. Many auto parts stores offer free battery testing. A new battery can cost $250 or more, but it’s a necessary investment for reliable transportation.
Frequently Asked Questions about Vehicle Jump Starts
We get a lot of questions about jump-starting cars. Here are some quick answers to the most common ones.
How do I choose the right jumper cables?
Choosing the right jumper cables is key for effective and safe jump-starting. We look for a few things:
- Cable Gauge (Thickness): For most vehicles, 4-gauge or 6-gauge wires are ideal. The lower the gauge number, the thicker the cable, and the more power it can transmit. Avoid thin 10-gauge cables for most passenger cars.
- Cable Length: Longer cables (16-20 feet) provide more flexibility when positioning vehicles, especially in tight spots.
- Copper Wiring: Cables with more copper tend to be more efficient conductors.
- Heavy-Duty Clamps: Look for clamps that are sturdy, well-insulated, and have strong springs to ensure a secure connection.
- Clear Polarity Markings: Red for positive and black for negative should be clearly visible.
Understanding metrics like Cold Cranking Amps (CCA) on your battery can also help you choose a jump starter that meets your vehicle’s needs, especially in colder regions like Buffalo, NY, or Minneapolis, MN.
Is it safe to jump-start a car in the rain?
While possible, jump-starting a car in the rain is not ideal. The voltage (12V) is relatively low, so the risk of serious electrocution from water is minimal. However, moisture can cause short circuits, damage electrical components, and make the process generally more hazardous.
If you must jump-start in the rain:
- Take extra precautions to keep connections as dry as possible.
- Ensure your hands are dry, and wear rubber gloves for added insulation.
- Avoid standing in puddles.
- If you’re at all unsure or uncomfortable, it’s always best to call a professional. Road Rescue Network is available 24/7 in many cities, from New York, NY to Los Angeles, CA.
Can jump-starting damage my car’s electronics?
Yes, absolutely. If done incorrectly, a vehicle jump start can indeed damage your car’s sensitive electronics. Modern vehicles are equipped with sophisticated computer systems (ECUs) that are vulnerable to voltage spikes or reverse polarity connections.
- Risk of Voltage Spikes: Incorrectly connecting or disconnecting cables can create sudden surges in electrical current, which can “fry” delicate electronic components.
- Reverse Polarity: Connecting positive to negative or vice-versa can cause significant damage to the alternator, starter, and other electronic modules.
- Importance of Owner’s Manual: Always refer to your vehicle’s owner’s manual for specific jump-starting instructions, as procedures can vary between makes and models. The manual often details specific grounding points or special steps required for your car.
Following the correct connection and disconnection order (as we’ve outlined above) is critical to minimize these risks. When in doubt, it’s always safer to rely on professional roadside assistance.
Conclusion: Be Prepared for Your Next Roadside Emergency
Knowing how to perform a vehicle jump start is an essential skill for any driver. We’ve covered the critical safety steps, the correct connection order, the differences between jumper cables and portable jump starters, and what to do when things don’t go as planned. Being prepared with the right tools and knowledge can turn a stressful situation into a quick fix.
Safety always comes first. If you’re ever stranded, unsure about the process, or facing a battery that just won’t cooperate, don’t hesitate to call for professional help. Road Rescue Network provides fast, 24/7 on-demand roadside assistance with no membership fees required. We’re here to get you back on the road in cities across the country, from Chicago, IL to San Antonio, TX, and everywhere in between. Stay safe out there!