Mastering Trailer Tire Installation: From Flat to Fantastic in Minutes
Why Trailer Tire Installation Skills Matter When You’re Stranded
Mastering trailer tire installation is a critical skill for any trailer owner. Knowing how to safely change a flat can save you hours of waiting and significant emergency service fees, whether you’re hauling a boat, work equipment, or a camper.
Quick Answer: The Essential Steps for Trailer Tire Installation
- Find safe, level ground away from traffic and engage your parking brake.
- Loosen lug nuts before jacking (while the tire is on the ground).
- Jack the trailer at a solid frame point, using wheel chocks on the opposite side.
- Remove the flat tire and install your spare, hand-tightening lug nuts in a star pattern.
- Lower partially and torque lug nuts to 90-120 lb-ft, then recheck at 25, 50, and 100 miles.
The process differs from changing a car tire. Trailer tires require higher PSI (typically 50-80 PSI), have thicker sidewalls for heavier loads, and use different jacking points. Many large retailers won’t mount trailer tires due to liability, making DIY knowledge even more valuable.
A flat tire on a trailer can be dangerous if not handled correctly, especially on busy highways. With the right knowledge and tools from a service like Road Rescue Network, you can turn a stressful breakdown into a manageable 20-minute fix and get back on the road confidently.

Trailer tire installation terms you need:
Understanding Your Trailer Tires: More Than Just Rubber
This section covers the essential knowledge you need before you even pick up a wrench, from identifying the right tires to knowing when they need replacement.
Before diving into trailer tire installation, it’s crucial to understand that trailer tires are specialized. They are not the same as car tires, and knowing their characteristics is the first step to safe towing.
ST vs. Passenger Tires: Key Differences
Using a regular passenger (P) tire on your trailer is a safety risk. “Special Trailer” (ST) tires are designed specifically for towing.

ST tires have thicker sidewalls and a stiffer overall construction to handle heavy loads and resist trailer sway. This robust design requires higher inflation pressures, typically 50-80 PSI, to carry the weight, prevent heat buildup, and avoid blowouts. Passenger tires, in contrast, are built for ride comfort and steering response at lower pressures.
Radial vs. Bias-Ply: Choosing the Right Type
ST tires come in two main types: radial and bias-ply. The best choice depends on your towing needs and budget.
| Feature | Radial Trailer Tires | Bias-Ply Trailer Tires |
|---|---|---|
| Construction | Plies run radially; steel belts | Nylon belts run at 30-45 degree angles |
| Cost | More expensive | Less expensive |
| Ride Smoothness | Smoother ride, less heat buildup | Harsher ride, more heat buildup |
| Durability | Longer tread life | Stronger sidewalls, better damage resistance |
| Best Use Cases | Long-haul drives, highway speeds | Short hauls, rough terrain, agricultural use |
For most modern trailers used for long-distance towing, radial tires are preferred for their smoother ride, better heat dissipation, and longer lifespan. Bias-ply tires are a tough, budget-friendly option ideal for short hauls on rough terrain, like on farm or boat trailers, where their strong sidewalls are an advantage.
When to Replace Your Trailer Tires
Trailer tires often age out before they wear out, typically lasting only 3-5 years regardless of mileage. Here’s when to replace them:
- Age: Rubber degrades over time from UV and ozone exposure. Replace tires every 3-5 years.
- Visible Cracks: Check sidewalls for cracks (weathering or dry rot), which indicate compromised structural integrity.
- Bulges or Blisters: Any bulge on the tire is a sign of internal separation and requires immediate replacement.
- Tread Depth: Use the penny test. If you can see the top of Lincoln’s head, the tread is below the safe limit of 2/32 inch.
Selecting New Tires & Common Brands
When selecting new tires, match the specifications to your trailer’s needs.
- Reading Tire Size Codes: A code like “205/75R14” indicates width, aspect ratio, construction (R for Radial), and rim diameter. Match your current size.
- Load Range: This letter code (LRC, LRD, LRE, etc.) indicates the tire’s ply rating and maximum load capacity. Ensure the total capacity of your tires exceeds your trailer’s Gross Vehicle Weight Rating (GVWR).
- Speed Rating: This letter indicates the maximum safe speed for the tire. Be aware of this limit.
- Common Brands: Reputable brands include Carlisle, Goodyear Marathon, Westlake, and Castle Rock.
DIY vs. Professional Installation: Weighing Your Options
Deciding whether to tackle the job yourself or call for mobile assistance is a key first step. Here’s how to choose the right path for your situation.
When a trailer tire needs changing, you have two choices: handle the trailer tire installation yourself or call a professional. Both have their merits.
The Case for DIY Installation
For many trailer owners, the DIY route offers compelling advantages:
- Cost Savings: The most significant benefit is saving on labor costs.
- Convenience: You can get back on the road in minutes instead of waiting hours for assistance.
- Skill Building: Learning to change a tire builds confidence and empowers you to handle future issues.
- Quality Control: Doing it yourself ensures the job is done to your standards.
When to Call for Mobile Trailer Tire Assistance
While DIY is empowering, calling a professional is often the smarter, safer choice.
- Lack of Tools: If you don’t have a working jack, lug wrench, or properly inflated spare, you can’t do the job.
- Safety Concerns: Changing a tire on a busy highway or unstable ground is extremely dangerous.
- Physical Limitations: Trailer wheel assemblies are heavy. If you can’t lift them safely, call for help.
- Tire Mounting Needed: If your new tire is not already on a rim, you need a professional with specialized mounting and balancing equipment.
- Complex Damage: If the blowout damaged the axle, rim, or other components, a professional diagnosis is necessary.
For times when you need on-demand help, Road Rescue Network connects you with local rescuers specializing in mobile trailer repair, like those in Calamine, WI.
Comparing the Costs
The financial aspect is a major factor in the decision.
- DIY Costs: Your main cost is the new tire assembly. You may also have a one-time investment in tools like a good jack and a torque wrench.
- Mobile Service Costs: You pay for the convenience, expertise, and specialized equipment brought to you. This includes labor, travel, and potentially the cost of a new tire.
- Hidden Costs: Factor in tire disposal fees and the value of your time. An improper installation, whether DIY or by a shop, can lead to expensive future repairs.
The Step-by-Step Guide to Safe Trailer Tire Installation
Here is the complete process for changing your trailer’s wheel assembly safely and efficiently, getting you back on the road in no time.
If you’ve decided to tackle trailer tire installation yourself, this guide will walk you through the process. Safety is the top priority. This guide assumes you are replacing the entire wheel assembly (a tire already mounted on a rim).
Essential Tools and Equipment
Gathering your tools beforehand makes the process smoother and safer.

- Properly Inflated Spare Tire
- Lug Wrench or Breaker Bar with Socket
- Trailer Jack (rated for your trailer’s weight) or a Tandem Wheel Ramp (e.g., Trailer-Aide)
- Wheel Chocks
- Torque Wrench
- Gloves
- Safety Vest and Reflective Triangles
- Flashlight or Headlamp
- Wooden Block (for jack stability on soft ground)
The Process for Safe Trailer Tire Installation
Follow these steps to get your new wheel on.
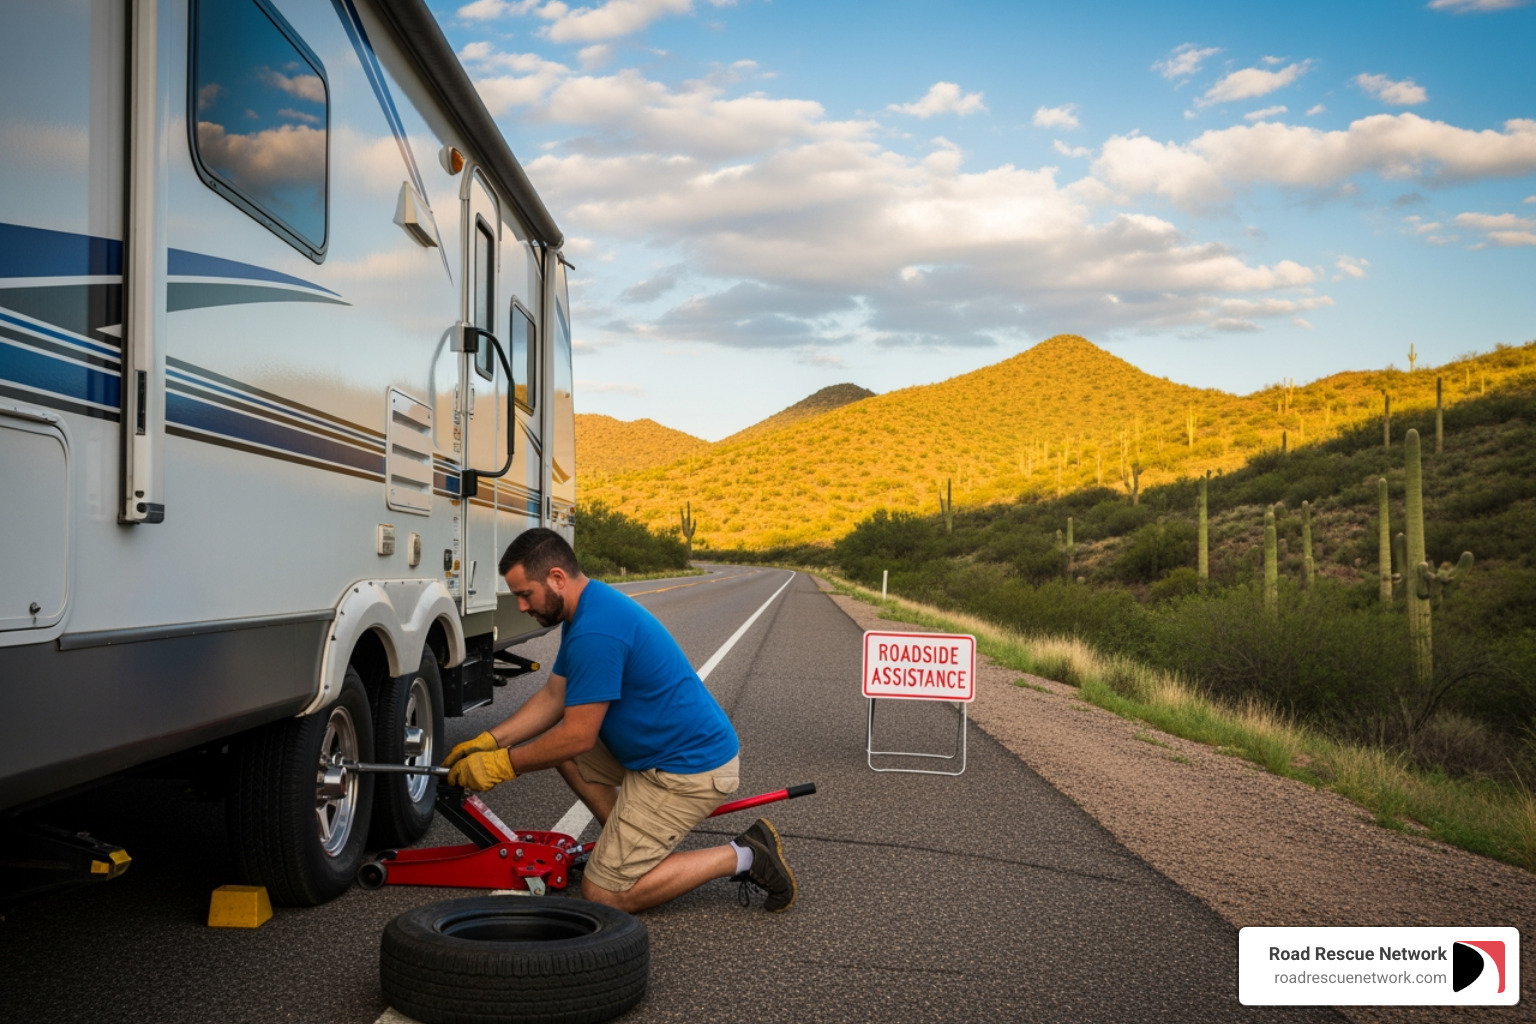
- Find a Safe, Level Spot: Pull as far off the road as possible onto a flat, stable surface. Engage your tow vehicle’s parking brake.
- Chock the Wheels: Securely place wheel chocks on the front and back of the tires on the opposite side of the trailer to prevent it from rolling.
- Loosen Lug Nuts: While the flat tire is still on the ground, use your lug wrench to loosen each lug nut about a half-turn counterclockwise. Do not remove them yet.
- Jack the Trailer: Position the jack under the trailer’s frame near the flat tire. Never jack on the axle itself, as this can cause damage. For tandem axle trailers, a ramp can be used to drive the good tire onto, which lifts the flat tire. Raise the trailer until the flat is completely off the ground.
- Remove Lug Nuts and the Flat Tire: Now, fully remove the lug nuts and carefully pull the flat tire straight off the wheel hub.
- Install the Spare Tire: Align the spare tire with the wheel bolts and slide it onto the hub so it sits flush.
- Hand-Tighten Lug Nuts: Thread the lug nuts on by hand, tightening them in a star or crisscross pattern to ensure the wheel is seated evenly.
- Partially Lower Your Vehicle: Slowly lower the jack until the tire makes contact with the ground but does not bear the trailer’s full weight.
- Use a Torque Wrench: Tighten the lug nuts to the manufacturer’s specification (usually 90-120 lb-ft) using your torque wrench, following the star pattern. Lower the trailer completely and check the torque on all nuts again.
- Final Checks: Check the air pressure in the new tire. Securely stow all your tools and the flat tire.
Critical Safety Precautions
- Always work on flat, level ground.
- Engage the tow vehicle’s parking brake and use wheel chocks.
- Use jack stands for extra support if you will be working under the trailer for an extended time.
- Never place any part of your body under a trailer supported only by a jack.
- Wear gloves and be visible with a safety vest if you are on a roadside.
Post-Installation: Maintenance for Longevity and Safety
Your work isn’t done once the new tire is on. Proper follow-up and long-term care are crucial for safety and maximizing tire life.
After your trailer tire installation, a few follow-up steps are essential for safety and the longevity of your tires.
The First 100 Miles: The Re-Torque Rule
This is a non-negotiable safety step. As you drive, a newly installed wheel can settle against the hub, causing lug nuts to loosen.
- Check Lug Nut Torque at 25, 50, and 100 Miles: Use your torque wrench to verify that the lug nuts are still tightened to the manufacturer’s specification (typically 90-120 lb-ft). This prevents a wheel from wobbling or, in the worst case, detaching.
- Listen for Unusual Sounds: Pay attention to any new clicks, clunks, or vibrations. If you notice anything, pull over safely and check the lug nuts immediately.
Long-Term Trailer Tire Care
Proper maintenance extends tire life and is critical for towing safety.
- Regular Pressure Checks: Trailer tires need high PSI (50-80 PSI). Always check the pressure when the tires are cold (before driving) and inflate to the maximum PSI listed on the tire’s sidewall.
- Visual Inspections: Before every trip, look for cracks, bulges, uneven wear, or embedded objects like nails.
- Protect Tires from Sun: When storing your trailer, cover the tires to protect them from UV rays, which cause rubber to degrade and crack (dry rot).
- Avoid Overloading: Never exceed your trailer’s Gross Vehicle Weight Rating (GVWR). Overloading puts immense stress on tires, causing heat buildup and increasing the risk of a blowout.
Considerations for Different Trailer Types
While the principles are universal, different trailers have unique needs.
- Travel Trailers: Proper load distribution is key to prevent uneven tire wear and sway. Radials are often preferred for their smooth ride on long trips.
- Utility Trailers: These often face rough conditions. The robust sidewalls of bias-ply tires can be a good choice for durability.
- Horse and Boat Trailers: Stability is paramount. Choose tires that handle environmental stress well, as boat trailers are exposed to water and both types may sit for long periods.
Frequently Asked Questions about Trailer Tire Installation
We hear a lot of questions about trailer tires and their installation. Here are some of the most common ones we encounter:
Can I mount the rubber tire onto the rim myself at home?
No, this is not recommended. Mounting a tire onto a rim requires a professional tire machine to seat the bead safely and a balancer to ensure a smooth ride. Attempting this at home is dangerous and can damage the tire or rim. This guide covers changing a complete wheel assembly (tire pre-mounted on a rim), which is a manageable DIY task.
What is the correct torque for trailer lug nuts?
The correct torque is critical for safety. While a common range is 90 to 120 lb-ft, this varies by trailer and axle type. Always consult your trailer’s owner’s manual for the exact specification. Use a calibrated torque wrench for accuracy and remember to re-torque the nuts after the first 25, 50, and 100 miles of driving.
Why do my trailer tires wear out so fast?
Several factors cause premature trailer tire wear:
- Age: Trailer tires typically have a lifespan of 3-5 years, regardless of mileage. The rubber compounds break down over time due to UV and ozone exposure.
- Under-inflation: This is a leading cause of failure. Low pressure causes excessive flexing and heat buildup, which destroys the tire from the inside out. Always inflate to the max cold PSI shown on the sidewall.
- Overloading: Exceeding your trailer’s weight rating puts extreme stress on the tires, leading to rapid wear and blowouts.
- Axle Misalignment: If the axles are not aligned, tires will scrub and wear unevenly.
- Improper Storage: Long-term exposure to direct sunlight causes the rubber to crack and fail prematurely.
Conclusion
Mastering trailer tire installation is an empowering skill that provides peace of mind on the road. By understanding your tires, using the right tools, and prioritizing safety, you can confidently handle a flat tire situation. Remember the key safety tips: always work on level ground, use wheel chocks, jack on the frame, and torque lug nuts to the correct specification. Re-torquing your wheels after the first 100 miles is also a critical step.
Preparation is your best defense against roadside emergencies. Always carry a properly inflated spare and the necessary tools. With this knowledge, you’re ready to tackle a roadside tire change and keep your adventures rolling. For those times when a DIY fix isn’t possible or you need immediate professional help, Road Rescue Network offers fast, reliable mobile trailer tire assistance with no memberships or hidden fees. We’re here to get you back on the road quickly and safely.